
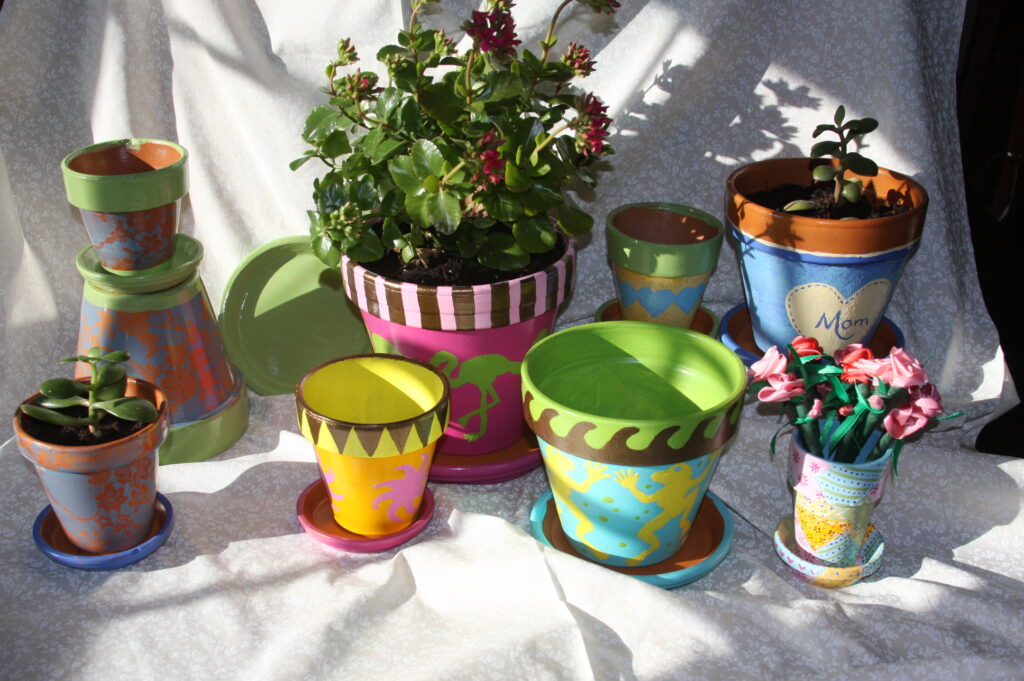
Lots of Painted Flower Pots! Four Designs to Choose From!
May 11, 2026 by Rachel
This tutorial was originally posted on my now defunct website Childrensart.info. I neglected to pay the hosting fees, and years of my craft tutorials were wiped out! Ouch! I’m trying to move some of them over to my website here when time allows and where I have enough of the original photos to make it feasible to rewrite the tutorials.
You can watch the video at the bottom of this post to see the processes for all four designs!
Sealing the Pot
We used both new and recycled terracotta pots for these stylish flowerpots. If you are using a pot that has had soil in it before, be sure to carefully scrub any dirt or discoloration off first.
Before you begin painting, you should seal the pot both inside and out. Sealing the pot prevents water from getting into the clay, which might make the paint flake off.
If you are working on a design where you want to keep some of the original terracotta color, you should seal the pot with acrylic based clear outdoor varnish (we use Ceramcoat).
If you want a white background to make the colors pop more, you should seal the pot with an opaque acrylic exterior white primer, found at most hardware stores.
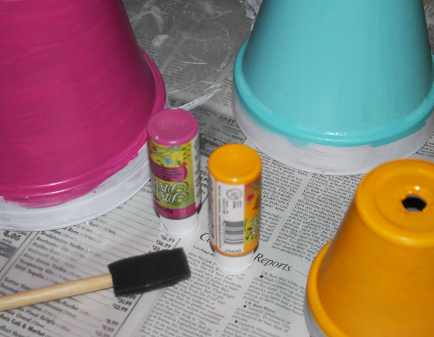
Primer and sealers can be ruin brushes if not cleaned carefully, so we used disposable foam brushes.
The finished pots are sealed with an outdoor gloss varnish so that they can be used for planted flowers.
Popsicle-Bright Flower Pots
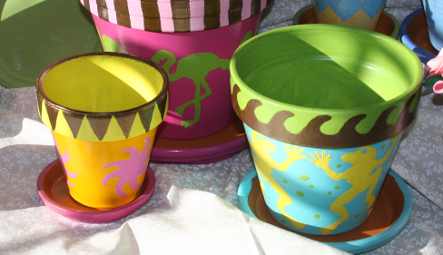
We chose to paint our pots with bright tropical-inspired colors, but the color choices are limitless. We have painted pots that are still as bright as when they were painted over a decade ago!
How to make Popsicle-Bright Terracotta Pots:
Seal the pot inside and out with white acrylic exterior primer.
Paint the bottoms and sides of the pots with bright outdoor acrylic craft paint. It may take a few coats of paint to cover the pots evenly.
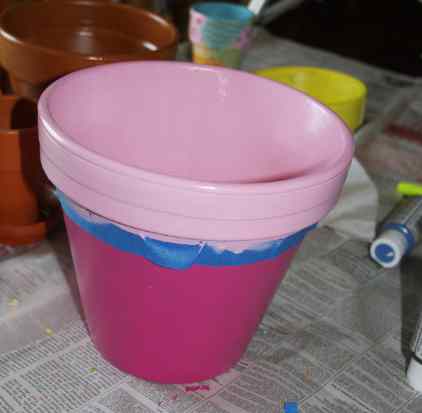
After the paint has dried completely, wrap painters tape around the bottom of the pot’s rim. Paint the rim and the inside of the pot with a lighter color paint.
While the pot dries, cut out a shape to trace onto the pot. You can draw out your own shape or use one of ours (Click here for our sun, flamingo and dancing frog templates).
With a pencil or permanent marker, trace the shape around the circumference of a pot.
Fill in the outlines with another paint color.
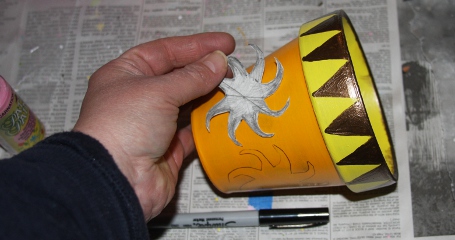
Paint a repeating border around the top of the pot. After the paint dries, seal the pot with clear outdoor acrylic varnish.
Crazy Quilt Flower Pot
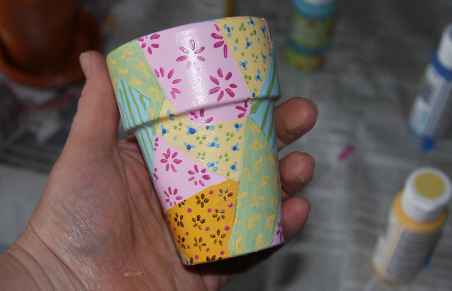
“Crazy quilts” are a special kind of quilt where leftover scraps of fabric are pieced together in a jumbled pattern. In the 1970s, when I worked crafts fairs, I often booth-sat for an artist who painted crazy quilt designs onto terracotta pots. Each and every pot had differently shaped painted pieces and different patterned painted fabric. Each was unique!
How To Make a Crazy Quilt Terracotta Pot
Using a foam brush, seal a terracotta pot inside and out with a white acrylic exterior primer. Let dry completely.
This is my favorite design of painted pots, so I decided to make a smaller one to store my pencils. I’m always misplacing them!
Choose four or five colors of outdoor acrylic craft paint (Patio Paints are my favorite because of the colors, but there are other brands that work as well). You will need craft brushes to paint random patches that fit together nicely (a foam brush would be too large for this). If your paints smudge together along the edges, you can always paint a few patches in one color that are separated from each other. Once those patches are completely dry, move onto a different paint color. It your brush crosses over an already-painted patch, you can just wipe off the mark before it dries.
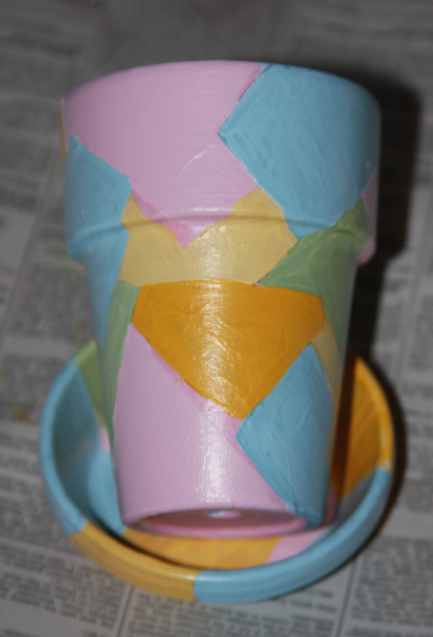
After the patches dry, paint in flowers, leaves, stripes and dots with a small brush. Space the designs evenly to make the patches look like a repeating fabric pattern. After the paint dries, seal the pot with acrylic outdoor varnish.
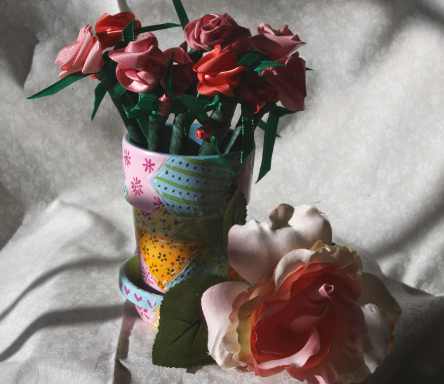
The flower pot is perfect to store my flower pens!
Lacy Flower Pots
Although this version can work with craft paints, spray paints give much better definition. If you are doing this with children, they will definitely need close supervision!
How to Make Lacy Flower Pots
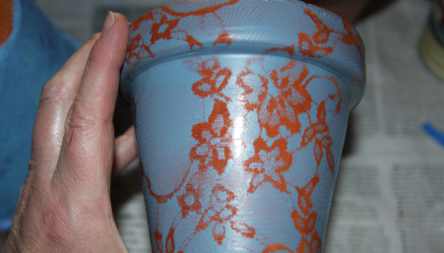
We wanted the terracotta color to glow through the lace design so we sealed the flower pot inside and out with clear acrylic outdoor sealer.
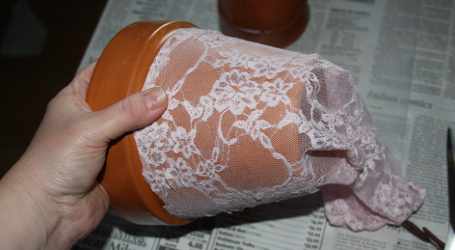
We found a pair of lace tights with a design we liked and cut off one leg. One pair can do four or six pots, depending on the size.
Pull the section of lace tight over the sealed terracotta pot.
We tried lightly sponging craft paint over the tights, but the design came out smudgy. After a few attempts, we rinsed out the tights, cleaned off the pots (which was easy, since they were sealed) and decided to try it with spray paint.
After making sure both lace tights and flower pots were dry, we headed outside with our spray paint. We made sure the tights fit relatively tightly around the pot, so that the paint wouldn’t creep under the lace. After taping the lace in place, we sprayed the pot following the directions on the spray can.
Again, spray paint should only be handled by an adult. Do not point the nozzle towards anyone’s face or eyes!
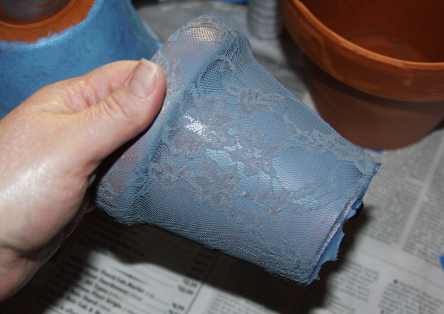
Spray paint smells much stronger than acrylic paint, so we left it outside to air for a few hours.
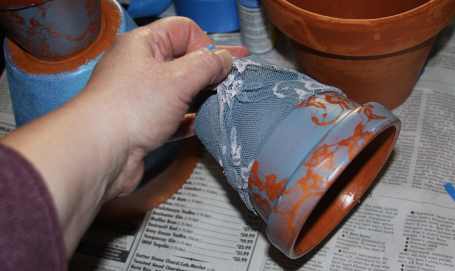
Then it was time to pull the lace tights off the flower pot. It was very satisfying!
After we gave the pot several coats of clear acrylic outdoor gloss, it was ready for planting.
Sponge Texture Flower Pot
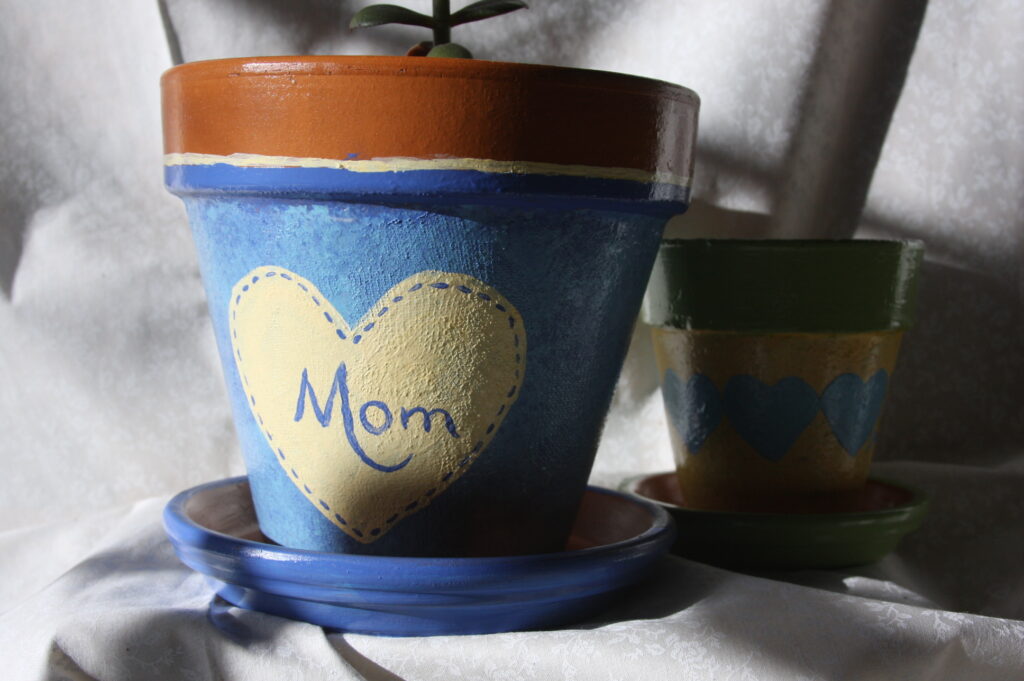
For this version, we used a few old pots that had pits and rough spots on the surface. The rough texture of the sponging hid many imperfections.
How to Sponge Paint a Mother’s Heart Flower Pot
After thoroughly cleaning the old flower pots we brushed on several coats of sealer and let them dry.
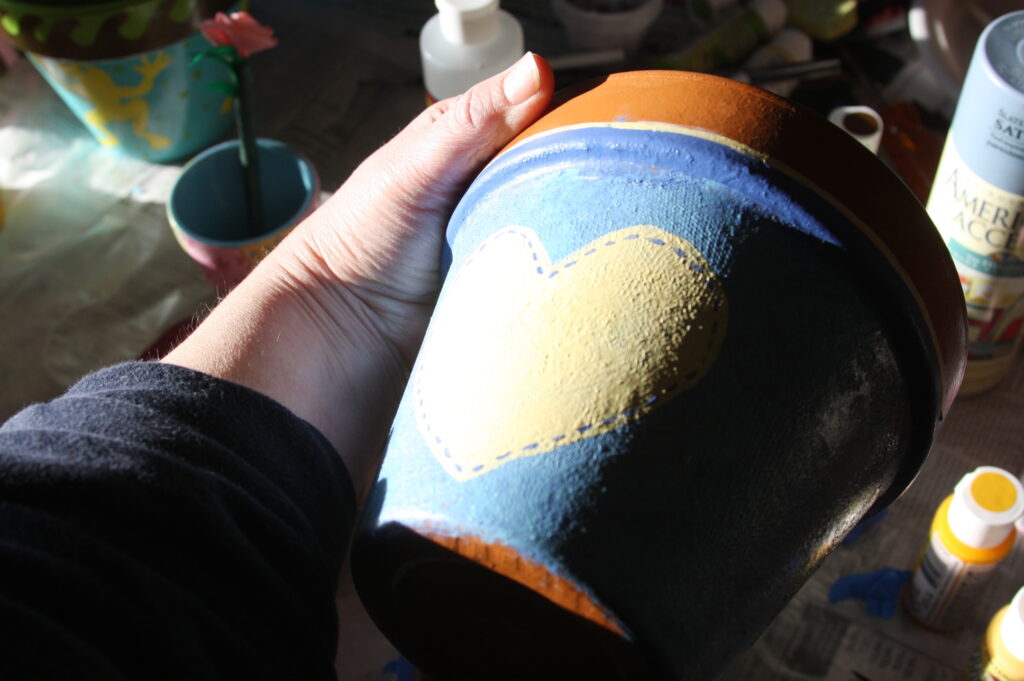
After our adventure with spray paint, we were back to using outdoor acrylic craft paint. We ripped a small piece of a brand new sponge, wet it, then squeezed out the water until it was barely damp. Tapping just a bit of medium blue paint on the damp sponge, we dabbed it all around the sides of the pot.
After the medium blue paint was completely dry, we dabbed a slightly lighter blue on top. We made sure not to completely cover the first coat. The slightly bumpy texture and the close tones of blue resemble denim cloth.
To make a border along the rim’s bottom, we wrapped painters tape above and below before brushing on color.

Or you can just use the tip of a flat brush.
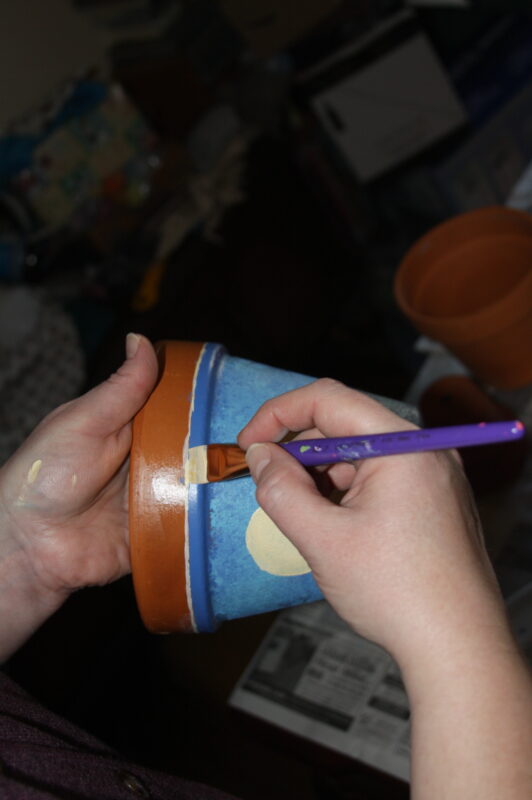
We painted a cream colored heart onto the front and added dashes of blue to represent thread. After painting “Mom” onto the heart patch, we sealed the pot with clear acrylic outdoor varnish.”</p>
To help defray the costs of website and content creation, RachelArmington.com is a participant in the Amazon Services LLC Associates Program, an affiliate advertising program designed to provide a means for sites to earn advertising fees by advertising and linking to amazon.com.


