Homemade Cookie Cutters
December 28, 2017 by Rachel

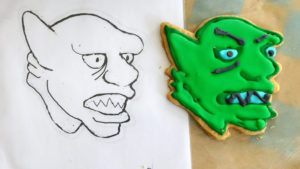
Feel free to resize my ogre, unicorn and cat cookie cutter templates. I’ve also included the link to my bunny templates from my Easter Bunny Penny Rug tutorial.
easter-bunnies-facing-left-and-right-template
You will need:
String
Scissors for cutting metal, or a pair of junk scissors
1” Aluminum strip
Pencil
Flat nosed pliers
JB Weld SteelStik Steel Epoxy Putty
Clear plastic sheet protector

You can use regular scissors for cutting the aluminum, but the blades won’t be the same afterwards.
If you can’t find aluminum strips, you can cut down aluminum flashing yourself. Just make sure that the flashing is untreated, and be careful of sharp edges.
When I checked JB Weld’s website, SteelStik putty was described as non-toxic. But as with food ingredients, please double check all materials before making these cutters, which will come in contact with food.
If none of the designs on this page appeal, you can find free clip art on line. Avoid areas that are too narrow or tight, as the dough might break easily or brown quicker than the rest of the cookie. I really wanted to make a Medusa cookie, but knew all those snake heads would probably burn.
To determine how long a length of aluminum strip you will need, measure around the drawing’s outline with string. Add one inch for overlap. It’s easier to cut the aluminum strip a little longer than to glue extra on later.
Mark with a pencil where you’ll need to make sharp bends with the pliers. I used both flat-nose and round-nose pliers. But most of the bends I just used my fingers.
You can smooth out and re-bend mistakes a few times, but the aluminum will break if it’s worked too much.
When you’ve shaped all the way around the cookie cutter, mark where the ends overlap. If the strip is too short, you can use tape instead of epoxy putty, or add a short aluminum strip to bridge the gap.
Break an inch or so off the SteelStik. SteelStik is an epoxy, meaning that two compounds are joined to make a strong adhesive. When the lighter gray exterior is mixed with the black core, the putty hardens.
Knead the two colors together until they are blended with no streaks. Work quickly because as the two compounds bind, the adhesive will grow very warm. Wash your hands thoroughly after you’ve finished attaching the ends with the epoxy.
The putty cures within a few minutes. If you need, you can clip the overlapping ends together.
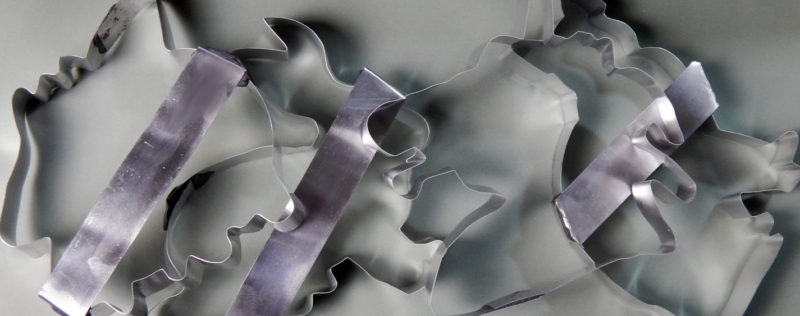
For larger cookie cutters, you may want to stabilize the design with an aluminum strip across the back.
Fold and flatten the ends of the strip and mix an inch or so of the SteelStik. Build the putty up on both sides of the cookie cutter.
Slip the printout template into a plastic sheet protector so that you can use it as a guide while decorating the cookies.


