3D Christmas Tree Card
December 5, 2019 by Rachel
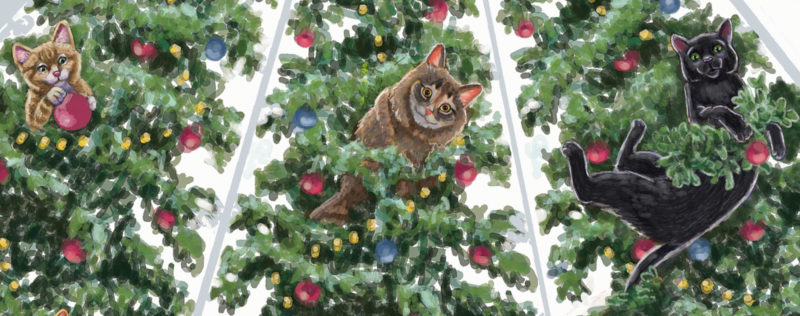
Please check the postage first if you are mailing these out as Christmas cards. Depending on the size you print these out, you may need additional postage. These flat cards are also available in ornament size at my Zazzle online store , with a painting of an orange tabby on the reverse side. I recommend ordering the flat card at the 6.5″ x 8.75″ size on semi gloss paper, which are a good size for ornaments.
Rachel’s YouTube Channel! If you enjoy watercolor paintings and crafts for children and cats, please consider subscribing to my videos on YouTube.

http://Templete for 3D Christmas Tree Pop Uphttps://rachelarmington.com/wp-content/uploads/Layout-WEBSITE.pdf
For materials, I recommend,
Ruler or straight edge: cork back rulers tend not to slip
Scoring tool, such as the handle of a plastic spoon, chopstick, small crochet hook, or the un-serrated edge of a butter knife. For the video, I was using a blunt tapestry needle.
Scissors
Glue: Tacky or school glue
If desired, ribbon or string, glitter, sparkly buttons, or pompom.
Ribbon and tape, if you are making a hanging ornament.
Most importantly, I recommend printing onto cardstock weight paper which will make the tree sturdy enough to hold shape.
If you want, you can adjust the size of the tree when you print it out.
You can also make a 3D Christmas Tree from scratch, without using the template.
Folding the tree into shape will be easier if you make creases along the lines that form the edges. Forming a crease in paper is called scoring. Although you can buy specific tools for scoring paper, it’s just as easy to use things you have around the house.
My favorite scoring tool is a small crochet hook, but I couldn’t find when I was working on this video. So I used a tapestry needle which has a blunt end.
You want to flatten the paper along the score, not gouge the fibers. The edge of your scoring tool should be thin but not too sharp. And of course, it should be clean so that it doesn’t leave a smudge on your paper.
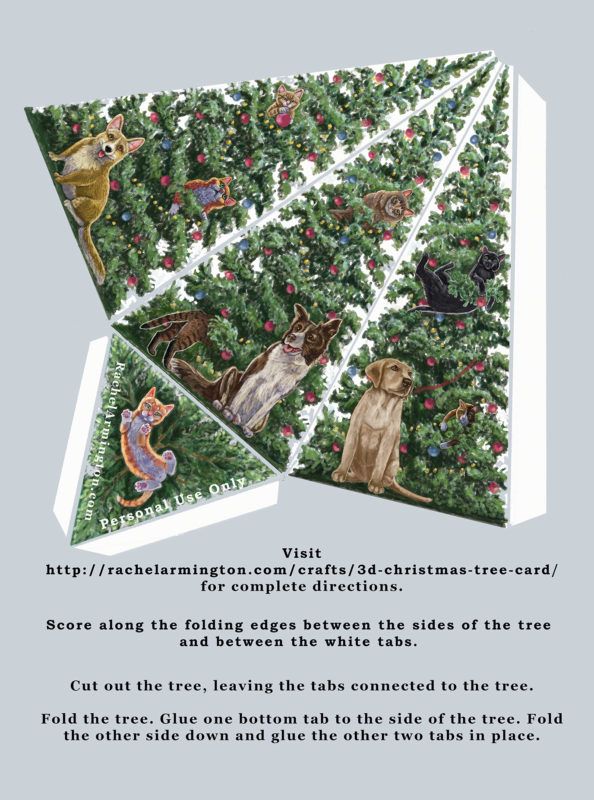
I personally find it easier to score the fold lines before cutting the tree from the sheet. Score between each side of the tree and between the tree edges and the white tabs.
I’m using a cork back ruler here. The cork backing prevents the ruler from slipping.
Cut out the tree, leaving the tabs attached to the tree.
Fold the tabs and sides.
Glue one tab from the bottom of the tree to the side. I find it easier to start with the Labrador and the black cat side of the tree, which has a tab along its side.
It’s easier to draw the glue onto the inside edge than to put it onto the tab. Smooth the tab down and hold for half a minute or so, until the glue has caught.
I’m using a tacky glue here that’s a bit thicker than regular school glue. It sets quicker.
Glue inside the remaining two edges, fold the tabs in place, smooth down, and hold the edges in place until the glue sets.
If you want to make the tree into a hanging ornament, glue a ribbon loop on the inside of the tree before you glue the sides shut.
Reinforcing the end of the ribbon loop with tape will make it stronger.
You can fill the trees with candy or small gifts and place them on each person’s plate at the holiday table or put the trees into their stockings.
Let the glue of the first tab dry a bit before putting candy inside the tree. If you put too much inside the tree, the sides will bulge and it will be hard to glue the tree shut.
Wrapped candies are best so there’s no chance of getting glue onto them.
Hold the sides shut for a minute or so until the glue catches.
You can attach name tags to the ribbon loops.
You can print out the template and decorate the tree your own way. If you are going to draw with colored pencils or pens, it would be easier to decorate your tree while it’s still flat, before you’ve folded and glued it into shape.
If you’re going to glue decorations onto the tree, it would probably be easier to add them after the tree is folded and glued into shape.
You can draw with glue and sprinkle glitter or flocking over the glue. Or glue on ribbons or sequins. If you have any old buttons or rhinestones, you can make them into tree toppers.
Here’s how to fold your own tree if you don’t want to print one out or use a template.
Start by folding a tab that will be wide enough that you can glue it. The width of the tab depends on the size of your tree: If you are making a small tree and the tab is too wide, the tab will extend over the fold and make shaping the tree difficult.
Snip a diagonal cut off the tab so that the paper won’t be too bulky when you fold the top of the tree.
Keeping the tab on one side, fold the paper into three triangles. Try to keep the sides even But if the triangles don’t end up perfectly even, don’t worry about it.
The edges at the bottom of the tree will be uneven. Measure from the shortest bottom edge to the top of the tree. Measure the same length down the opposite edge of the triangle and draw a line. Then cut off the layers below.
I’m going to add a bottom to this tree, so I want to know how wide each side is along its bottom edge. On this tree, the bottom edges of the triangle measured approximately 10 centimeters.
As well as you can, trace around the bottom of the tree. This is more to mark where the folded edges will line up, especially if the width of tree’s triangles aren’t the same.
If necessary, redraw the traced bottom with a ruler. Use the marks you made at each point of the folded edges of the top tree.
The legs of the bottom triangle I redrew were each approximately 11 centimeters, larger than the 10 centimeters that I measured earlier. I wanted this bottom triangle to fit inside of the top of the tree. So I redrew it with each leg a bit shorter than 10 centimeters.
Then I sketched tabs for each side of the bottom triangle.
I cut out the bottom triangle, scored the folds, and folded the tabs.
Before I glue the tabs, I checked to see how the bottom fits inside the top of the tree.


