Rachel’s Original Felty Fairies
July 3, 2017 by Rachel
I will also be posting tutorials on how to make clothing, needle-felt, paint, and add hair to Felty Fairies.
We live on a quiet street, and some Halloweens we’ve had over two hundred children come trick-or-treating, most of them having been driven to our neighborhood by their parents. Some of our neighbors go all out with ghosts and vampires and gravestones, and one house even has a gory guillotine on it’s front lawn! We’ve always decorated our yard to be more friendly for the younger kids, with a rocket-flying pig and a papier-mâché dragon.
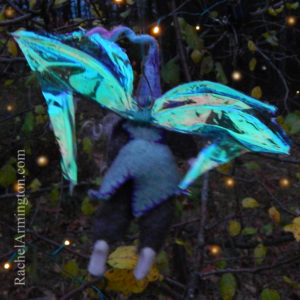
Several years ago, I imagined small fairies hanging from hedges as the trick-or-treaters walked up our lighted path. 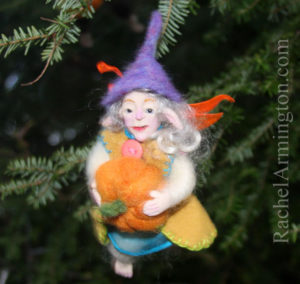
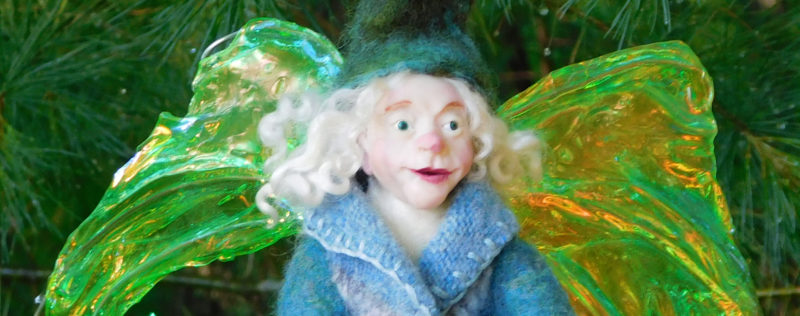
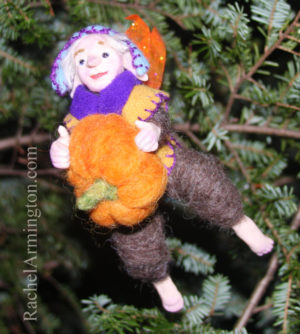
I’d made one-of-a-kind (OOAK) polymer clay fairies before, and was madly in love with felting. I figured that I could simplify the detail I usually put into my OOAK fairies and just give them faces, hands and feet. Soft, needle-felted bodies would protect the fairies if the wind shook them from the hedges. And instead of the rigid wire and plastic film wings I made for my OOAK fairies, more flexible wings would work better outside.
The only problem was that, unless you were pointing a camera flash at the fairies, nobody could see them. I hung them lower, closer to child-eye-level. I surrounded them with strings of warm white LED lights. I focused bright spot lights on the fairies. They still weren’t being noticed. After a few years of experimenting, I finally decided to give the fairies larger, rigid wire and plastic film wings. They caught the light better and were more visible.
You can resize 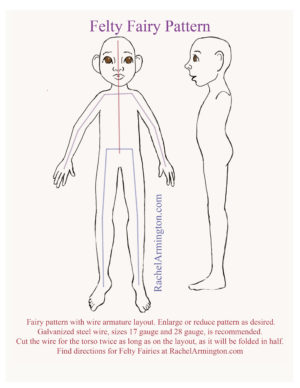 Rachel’s Original Felty Fairy Pattern to make smaller or larger fairies. My fairies have longer legs than the average human proportions. You can use an anatomy book if you want fairies that look more “human.” If you are using glass eyes, you may need to adjust their diameter to match the fairy’s adjusted size.


